How to build a garden bed cover that blocks all critters (under $40)
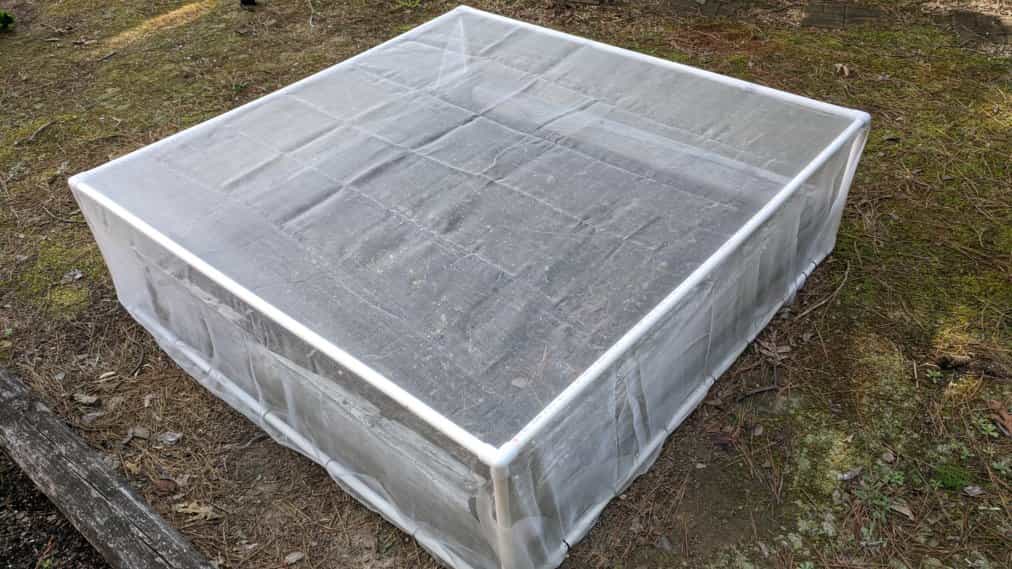
My wife loves to grow vegetables in our backyard.
As a dutiful husband, I had built her raised vegetable garden beds as described in this post.
But the only problem is that the critters in our backyard, including insects, lizards, squirrels, and bunnies just don’t let her grow anything. 😧
More often than not, one or more of these critters eat away or uproot seedlings as they appear in the garden.
Thus it was time for another honey do project, a garden bed cover. 🥺
I had the following criteria for the build:
- Lightweight: the cover is light enough for my wife to lift up easily, to apply fertilizer for example
- Blocks critters of all sizes: we needed the cover to hinder insects just as easily as it does bunnies
- Inexpensive: I wanted the cover to be an inexpensive build, as this was an accessory to the inexpensive raised bed I had built earlier
- Easy to build: I didn’t want the build to take any more than an afternoon’s (<4hrs) worth of work
- Weather resistant: We wanted the cover to last for years outdoors
I set out to look for plans that met all these criteria, but as usual, I couldn’t find any online that met all conditions.
So I made my own plan as described below.
Hope this post empowers and inspires you!
Supplies and cost
| Item | Count | Price | Store |
| 1/2″ x 10′ PVC pipe | 4 | 4 x $2.5 = $10 | Home Depot |
| 3-way PVC elbow | 8 | $12 | Amazon |
| PVC cement | As needed | $1 | Amazon |
| Garden netting | 1/4 roll | $10 | Amazon |
| 6″ Zip ties | 1 | $5 | Amazon |
Total cost of supplies: $38
Power tools required
No power tools required for this project!
The only cutting you’ll have to do is the cutting of the PVC pipes and the netting. Power tools aren’t required for either!
How to build it
Step 1: Measure the exact size of your garden bed
You want the cover to fit the bed snuggly.
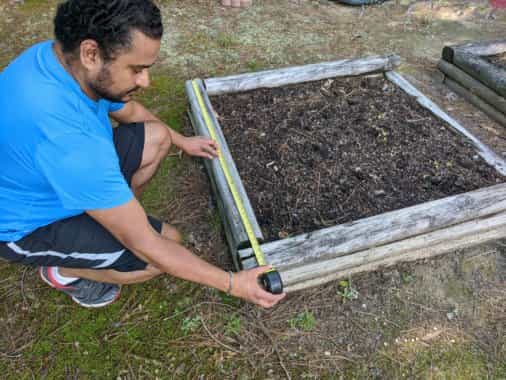
Measure the dimensions of each side of your garden bed using a tape measure as shown in the picture below.
The supplies outlined in this post will work as long the garden bed is 4.5′ or less along each side.
Step 2: Cut the PVC pipes
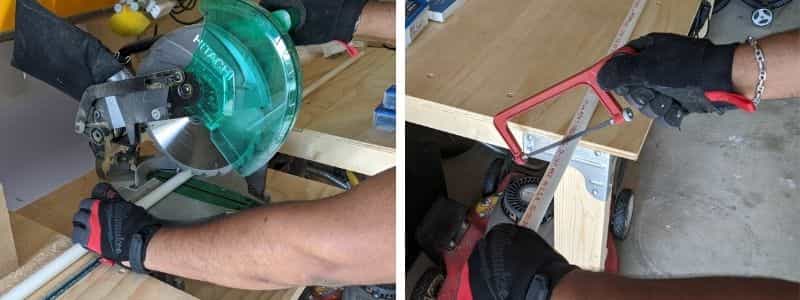
The next step is to cut each of the PVC pipes into 3 pieces such that 2 of the pieces are slightly (~1″) longer than the sides of the garden bed.
The PVC pipes are easy to cut. You can either use a miter saw or a hand saw as shown in the picture below. You can even buy inexpensive pipe cutters like this one from Amazon.
Step 3: Join the PVC pipe pieces and elbows
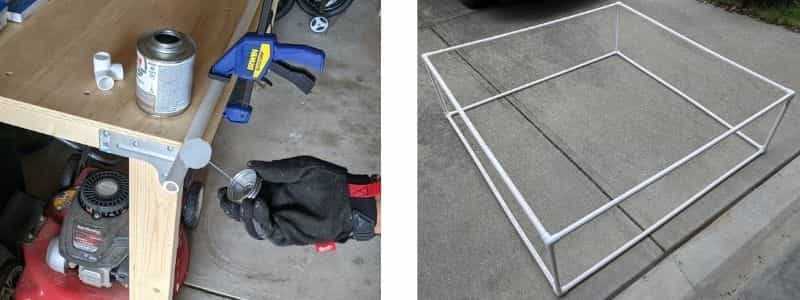
In the next step, join the PVC pipe pieces using PVC cement and 3-way elbows into a box shape as shown in the picture below.
Follow the instructions on the cement bottle to do this.
Note: Working with PVC may seem daunting, but don’t worry. Anyone can do these steps. You’ll get the hang of it quickly.
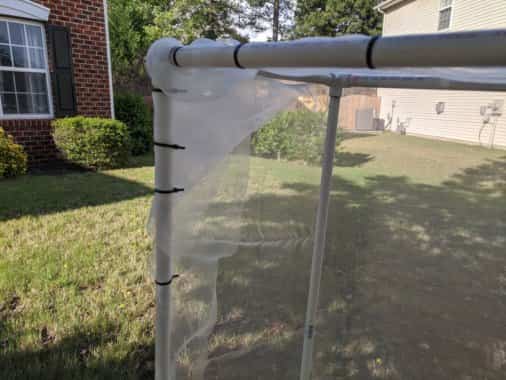
Step 4: Wrap and tie the garden netting
The final step in making the cover is to wrap the PVC pipe structure on 5 sides with the garden netting cut to size.
Use zip ties to secure the netting in place.
See picture below of this process.
You’ll notice that the pointy end of the zip ties are just small enough to pass through the net while doing this.
Step 5: Install the cover over the garden bed
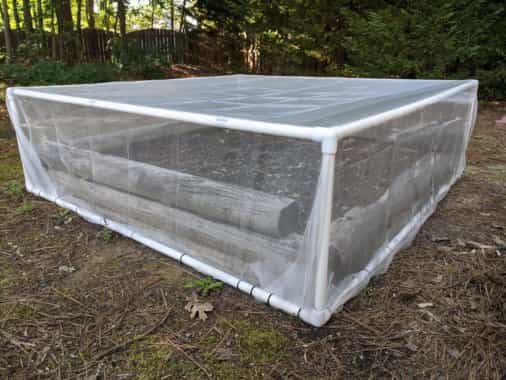
The final step is to install the cover over your bed as shown in the picture below.
It will now protect your bed from critters of all sizes!
It should be light enough for you to lift at one end to access the bed.
All materials used in this project are weather resistant.
This cover will last for years. Ours has already lasted for 2 years!
Have you enjoyed this post? Do you have any questions or suggestions for improvement? Please leave a comment below. I’d love to hear from you.