How to build a stupid simple cedar raised garden bed
My wife wanted to plant some vegetables in the spring of 2019.
Well, you can guess what that means for me. Yep, a honey do project. 😀
I knew going into the project that this would be fairly straightforward, given I had already completed relatively complex projects, like the swing set I built for our twin girls.
I also knew this would be similar to the sandbox I built for our girls, but different in that this one would need to be higher.
But I had several criteria that meant some additional research and planning:
- The build is as inexpensive as it can be.
- The bed will last for years.
- The bed is perfectly safe, meaning a naturally rot-resistant wood instead of pressure-treated wood.
- The build is as simple as it can be, but still sturdy.
After searching through plans online and YouTube, I quickly realized (as with many other projects) that none of the available plans met all criteria. 😒
I had to make my own plans.
The sections below describe what I did.
Hope my plan inspires and empowers you.
Enjoy reading!
Supplies and cost*
*Cost as of Mar 2021 when home improvement supplies expensive, due to the economic impacts of the COVID pandemic
| Item | Count | Price | Store |
| 5/8″ x 5.5″ x 6′ Cedar dog ear fence picket | 8 | 8 x $3.17 = $25 | Home Depot |
| 2″ x 1.5″ x 2.75″ Galvanized angle | 8 | 8 x $.68 = $5.5 | Home Depot |
| 1″ x 4″ x 8′ Cedar board | 1 | $9 | Lowe’s |
| 1.25″ Deck screws | 1/2 box | $5 | Home Depot |
| Landscape fabric | 1/5 roll | $2.5 | Home Depot |
| Potting mix | 10 | 10 x $8 = $80 | Home Depot |
Total cost: $127
Power tools required
How to build it
Step 1: Make the raised bed frame
The frame is really simple.
Cut 1′ off the “dog ear” end (the end with corners cut off) of each 6′ cedar fence picket.
Join the eight 5′ cedar boards using the galvanized angles and deck screws, to form a 5′ x 5′ frame as shown in the picture below.
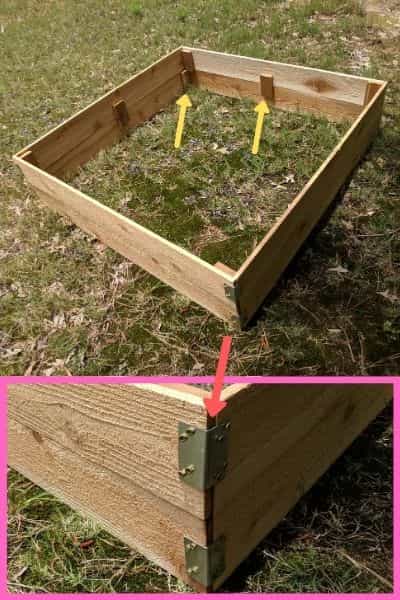
You can see that I used 1″ x 4″ cedar pieces to reinforce the corners, where the 5′ cedar boards join.
Each of these 1″ x 4″ pieces are 5.5″ inches long, which is same as the width of the fence picket boards
I also used the 1″ x 4″ pieces in the middle of each side of the frame, to join the “top” and “bottom” halves of the frame.
Note: The deck screws were driven from the “outside” of the bed, including the screws driven into the middle of each side of the bed. This is important to have the screws not touch the soil and therefore last longer than they would otherwise.
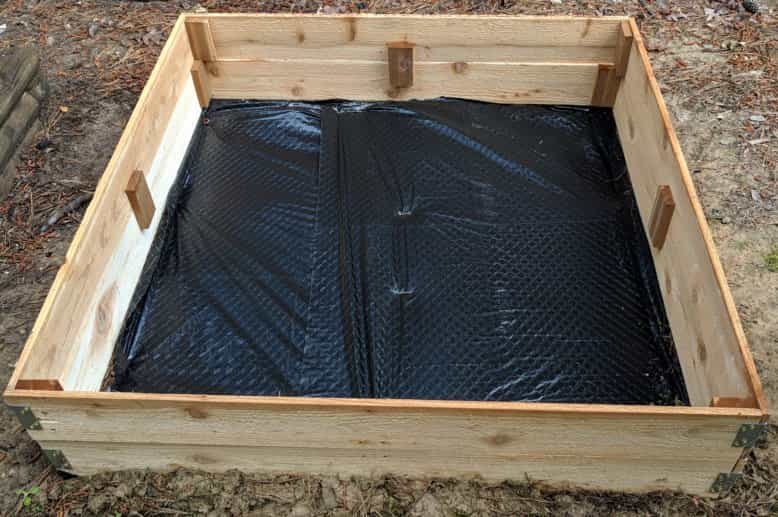
Step 2: Install the frame
Find a flat 5′ x 5′ area of your yard where you’d like to have the bed.
Make sure the area that you pick gets plenty of sun!
Lay down landscaping fabric over the area. The landscaping fabric prevents weed from growing from the ground into your bed.
Install the bed frame over the fabric as shown in the pic below.
You’re almost done!
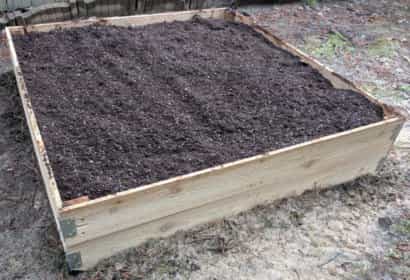
Step 3: Fill with potting mix
The last and final step is to fill the bed with potting mix.
This step will take time. The easiest way I found was to:
- Place each bag of potting mix inside the bed,
- Slash one side of the potting mix bag with a utility knife
- Lift the opposite end to empty the contents into the bed
After emptying all the mix into the bed, spread the mix evenly throughout the bed, e.g., using a rake.
At the end, you should have something like the picture below.
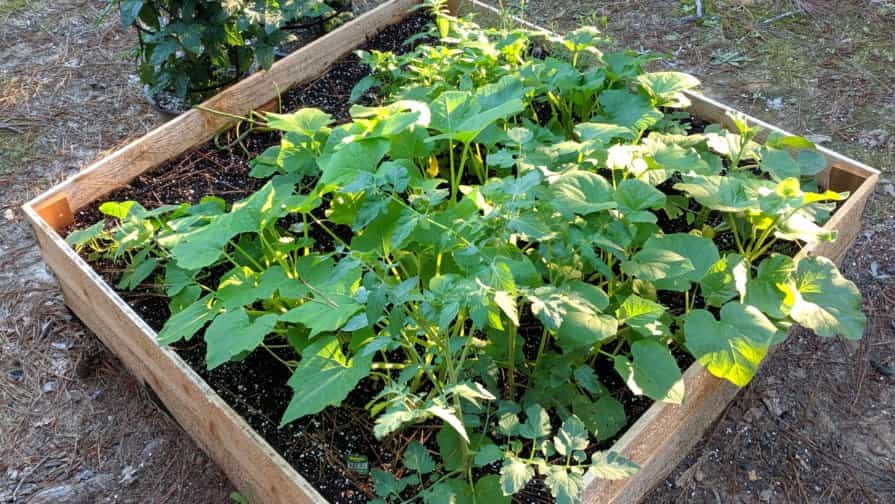
The resulting bed will last for years! Mine has already lasted 2 years.
Optional step: Build a bed cover
If you have critters in your backyard that like to destroy your veggie plants, then you may need to cover your garden bed.
See this post on how to build a lightweight, long-lasting, inexpensive bed cover that can block critters of all sizes.
Have you enjoyed this post? Do you have any questions or suggestions for improvement? Please leave a comment below. I’d love to hear from you.