Easy way to remove tree sap (resin) from lumber for woodworking
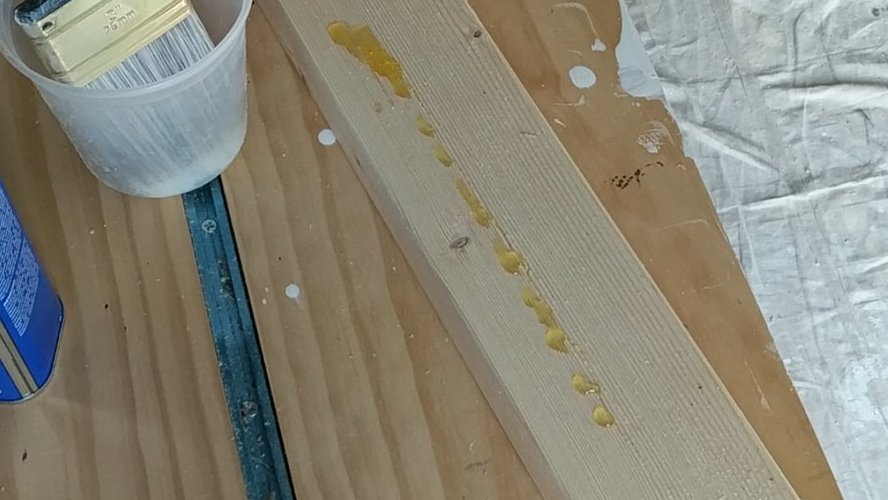
It’s not uncommon to find yucky, sticky sap or resin oozing out of lumber that you’ve just bought from the store for a woodworking project.
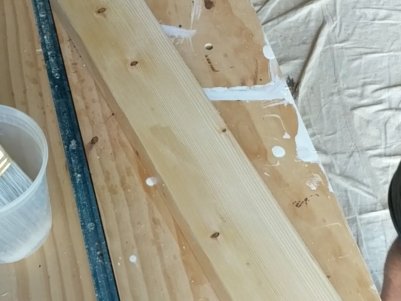
Sap is especially common in lumber from spruce, pine, and fir (SPF) trees, the most common type of lumber found in big-box stores like Home Depot.
Pine sap, or sap in general, sticks to everything in its way – your clothes, sander, drill bit – you name it.
Since it sticks to everything, you can’t scrape it cleanly with, say, a knife. I learned that the hard way. 😕
Then one day, I discovered through experimentation how to cleanly remove tree sap or resin from my lumber.
I later learned what I discovered was already known to many, but still decided to create a comprehensive post about it for those who don’t know.
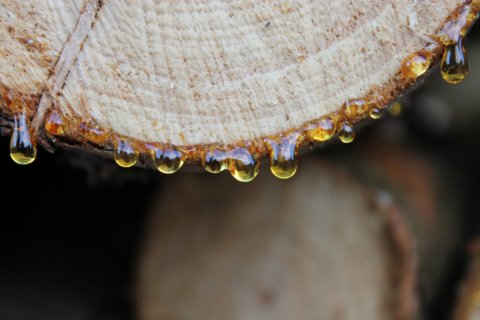
Note: I use sap and resin interchangeably in this post. Strictly speaking, sap is a liquid that flows throughout a tree. It carries nutrients, like blood does in animals, and is mostly water and sugar. For example, maple syrup is made from maple tree sap. On the other hand, resin is a highly sticky, protective substance secreted through special ducts in a tree to help it heal when its branches are injured or cut. It also protects the tree against infections and insect attacks. So, strictly speaking, it’s the resin that this post is about. Check out this link to learn more.
The trick was to chemically remove the goo by using a solvent that I typically keep in my humble shop: paint thinner.
Since you as a woodworker also probably work with oil-based stains and paints, paint thinner is something you too probably have handy, so I hope you find this post useful.
Supplies and cost
| Item | Count | Cost | Store |
| Paint thinner (Klean-Strip brand) | 1 quart can | $6 | Home Depot |
Total cost: $6
How to remove sap using paint thinner
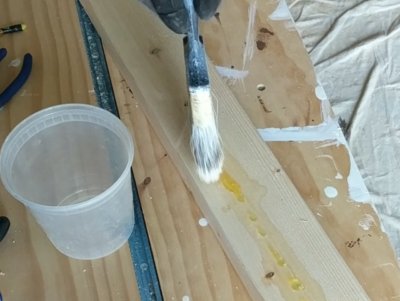
Step 1: Dab the thinner generously on and around the sap
First, dab a generous amount of paint thinner on and around the area of the lumber with the tree sap.
I used a paint brush for this step, but a rag cloth or old sock will also work just fine.
Caveat: Be sure to wear protective gloves if you’re using a rag cloth or old sock to apply the thinner.
The paint thinner will begin to react with the sap to soften it, break it down, and dissolve it.
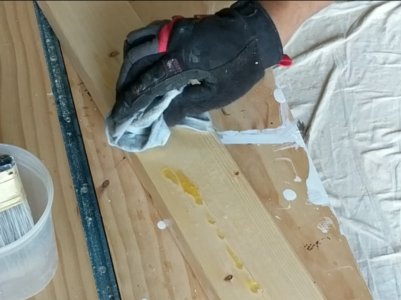
Step 2: Scrub the sap with a rag cloth or old sock
Scrub on and around the sap with a rag cloth or an old sock.
You should feel the softened sap falling apart and slowly disappearing as you scrub.
Fact: Paint thinners are made of mineral spirits like Acetone and Turpentine. These spirits dissolve tree sap. That’s why scrubbing with cloth works after application of the paint thinner.
Have you enjoyed this post thus far? Do you have any questions or suggestions for improvement? Please leave a comment below. I’d love to hear from you.
Step 3: Repeat
Repeat steps 1 and 2 until the sap is completely gone.
In my experience, repeating the steps about 3 times is sufficient to remove all of the sap.
Bonus section: common questions about tree sap
While doing research for this post, I came across some common questions around tree sap.
I decided to summarize them below. Hope this helps!
Can lumber continue to ooze sap after the cleanup?
Unfortunately, yes, even if the wood is “kiln dried.”
Kiln dried wood is not supposed to have sap oozing out of it. The drying process is supposed to apply enough heat to set the sap permanently.
Unfortunately, there’s no guarantee that all kiln dried wood have been heated up to the recommended temperature and duration.
If the drying process wasn’t completed correctly, any unset sap can seep out of the lumber before it gets to the store, in the store, after you buy the wood from the store, and even after you complete your project!
Is there a way to seal the tree sap permanently?
Heating wood up to the recommended temperature of 160oF/71oC is the only fool-proof way to seal the sap permanently.
If you’re able to kiln dry the wood up to that temperature, then do it. But this is not a practical solution for most. How many of us have access to a kiln, right? 🤣
If your lumber is small, and if you have a blowtorch, then use it to heat the lumber. Keep in mind, the torch will char the wood! Your project will need to be OK with the charring.
Common wood finish products like stain, paint, polyurethane, etc. don’t create barriers that are strong enough to stop the sap. ☹
Treating areas at risk of sap seeping with thick shellac-based products can sometimes seal the sap, but these methods aren’t fool-proof.
Will tree sap damage car paint?
Short answer is yes, unfortunately.
If you park your car frequently under trees, you’re very likely to have tree sap drips on your car.
The damage caused by tree sap to car paint isn’t instantaneous.
But tree sap is highly acidic, and it will slowly start causing permanent damage.
If the sap is left on the paint for a long time, two undesirable things will happen:
- The sap will collect dust and bugs because of its stickiness. If the sap spill is big enough, that’s the first thing anyone looking at your car will see. 😂
- The sap will start to react with the clear coat and paint. It will etch itself into the paint, causing stains and permanent discoloration.
There’s no simple formula that answers how long you can leave tree sap on the car before it causes damage. If you see sap on the car, remove it asap.
How to remove tree sap from car?
A standard car wash will not get rid of tree sap, unfortunately.
Paint thinner, which is safe for lumber, isn’t safe to use on a car, because, well, it will dissolve the paint, not just the tree sap, duh! 😁
And, resist the urge to scrape the sap away with a hard object, as that will not only not get rid of the sap cleanly, but also damage the car paint.
The safest option is to use a commercial product, as described here.
If you’re hesitant to buy a product, there are some home remedies available, like isopropyl alcohol.
Will WD-40 remove tree sap?
The short answer is yes. And you can use it on a car!
WD-40 is the brand name of a water-displacing solution or spray manufactured by an American company based in San Diego, California.
The exact ingredients of this spray is a trade secret!
The manufacturer of WD-40 officially claims the it can remove tree sap.
Spray a small amount of WD-40 on the sap. Allow the fluid to soak in. Covering the area with a paper tower soaked in WD-40 can prevent the chemical from running away.
After a few minutes, gently scrub the area with a cloth or another paper towel.
Of course, do a bit of research to make sure WD-40 will not harm whatever surface you’re trying to get sap out of.
Have you enjoyed this post? Do you have any questions or suggestions for improvement? Please leave a comment below. I’d love to hear from you.